How to get your own personal domain and hosting account
I recommend using BlueHost when you purchase your domain and also for website hosting. I use them for my own personal domains (LanceCarter.net among others). They’re inexpensive and have great customer service.

Feel free to look for other hosting options but I’ve tried out a bunch over the years and these guys are the best. If you do decide to use another company, let me know before you sign with them. If they stink, I’d just want to let you know.
Let’s get started!
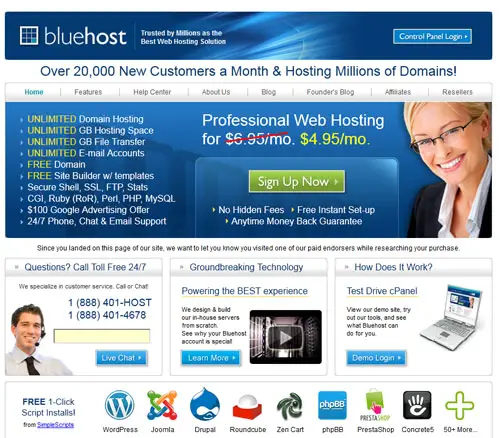
1. Go to Bluehost and you’ll see the screen below. Click onto the ‘Sign Up Now Button’.

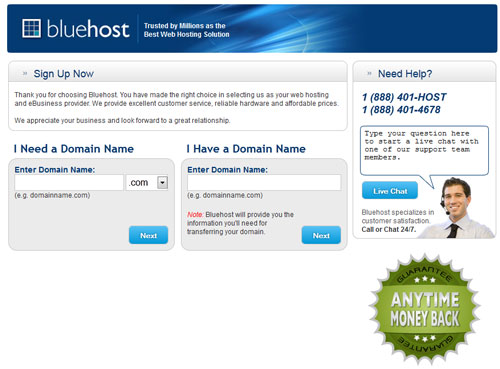
2. Next up, you get to choose your domain name. Hopefully, you’ll be able to get your own .com name but if not you could always use .net (like I had to do). Additionally, you’ll be shown some alternatives names once you hit ‘Next.’

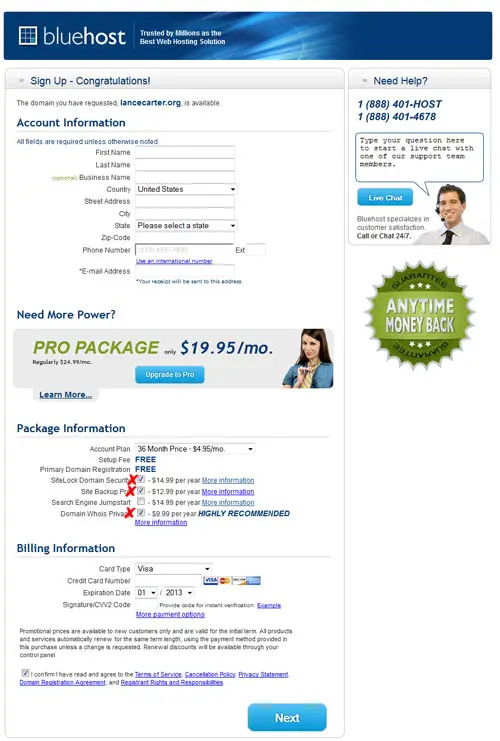
3. Once you choose your domain name, you’ll be asked to enter all of the information needed to finalize your purchase.
If you look at the picture below, you’ll see a couple of Red X‘s. The options next to the X‘s are automatically checked. I don’t recommend them so just make sure you un-check them before you hit the ‘Next’ button.
There are several pricing options to choose from; a 12-month option, a 24-month and a 36-month. The 36-month is always the cheapest but since they charge you once – meaning, whatever option you choose, you’ll pay for the full year(s) up front. I always choose the 12-month plan. You don’t need the Pro-option.

4. Next, you’ll be asked to create a username and password.
Pick whatever username you’d like. Since I’ll be installing the site onto your new domain, I suggest using a temporary password that you can initially use and send to me. Once everything is up and running, you can change it back or keep it the same.
Once that’s done, send me your new username and password and you’ll be on your way to your new website!
If you have any questions, ask away!
